9 Bike Maintenance Issues Faced by Mechanics Daily
Bikes used to be easy to fix. The days of flipping your bike upside down to repair a thing or two are over. Today’s bikes are more sophisticated and sometimes require professional help.
Your local bike shops can come to the rescue, but who always has time to bring a bike in for service?
Wouldn’t it be easier to do little repairs at home?
As a former mechanic, I’m here to introduce you to a few solutions to the common problems encountered by bicycle mechanics daily.
Ready to get your hands dirty?
On This Page
Worn Drivetrain
A worn drivetrain sneaks up on you. After a few seasons, yours is looking rather dirty, so you’ve decided to change it. You’re proud of doing it yourself, but the new chain isn’t working with the rear cassette, you’re too late.
Let me tell you why.
Every chain has a life. As you turn the pedals over, repeated friction with the cassette causes the chain links and rollers to wear. It’s made of heavy-duty stuff, but with use it becomes thinner, elongating the chain over time.
Not only is the chain longer, which affects shifting, repeated friction with the cassette has made wear marks on it. Think of a favorite pair of jeans. You’ve worn them so often they’ve taken your shape. Put them on someone else, and they just don’t fit.
This is what happened to your chain, so when a new one of the correct length with no wear is installed, it doesn’t function with your cassette. The new chain rides against marks on the cassette made by your old chain and the two don’t match, throwing shifting out of whack.
If you’ve waited too long to change your chain, you’ll have to bear the costs of buying a new cassette, and they aren’t cheap. With a new chain and cassette, the wear process starts all over again. There’s a way to prevent this, get yourself a chain checker, or have your local bike shop check it periodically.
A chain checker measures the distance between the links, showing its wear. At 50%, start thinking about a new one. 60% or above, change it before it’s too late. Cassettes have a long happy life when the chain is changed regularly and in time, saving you money too.
Worn Tires
You’ve had a series of flats, and aren’t sure why.
The tires seem okay, but you haven’t taken a good look. When you start getting flats, other than the obvious shard of glass, it’s a sign your tires may be worn. Regardless of the tire, here are a few things to look for.
How’s the tread?
Have any knobs broken off your mountain bike tires or look worn?
Inspect road tires from the back of your bike at eye level. Is the top squared off?
Check sidewalls for cuts and damage, bubbles, and dry or bald patches where the threads show through. These are hints it’s time to change your tires.
To change them, you’ll need new tires, tire levers, and a pump. It’s old-school, but I recommend powdering your tubes (if you run them) with talc. Put a pile in your hands and glide a semi-inflated tube through it, lightly covering the tube. This protects against pinch flats and makes installation easier.
Now slip the inner tube inside the new tire. Verify the tire’s directional arrow (on the sidewall). Inserting the valve stem first, work in the bead as you go around. Tire irons are great for removing a tire, but I avoid them when installing a new one.
Use your thumbs and palms to seat the tire. Add some air, checking every few strokes that the tube isn’t pinched between the sidewall and bead. Pump to your desired pressure.
If you’re running tubeless, have tubeless sealant ready.
Read More : A Quick and Easy Guide to Bike Tire Pressure
Loose Nuts and Bolts
The easiest of fixes, provided you catch them in time. Loose nuts and bolts wear the threads, so if you hear weird noises on your bike, start checking for bolts that aren’t tight.
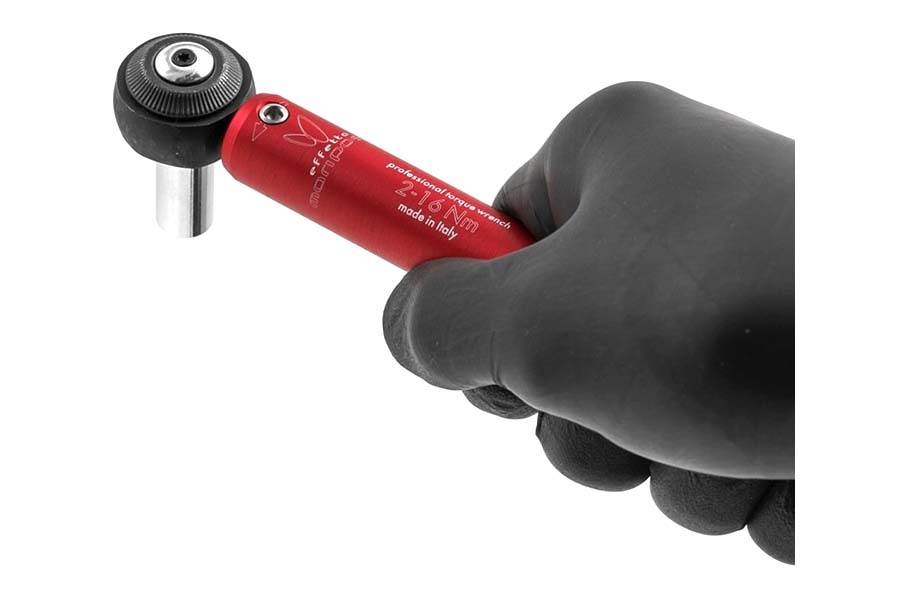
A set of Allen keys or a T25 may be all you need, but some may require precision tightening with a torque wrench.
Numbers printed next to bolts show their tightening tolerance. These numbers can be in foot-pounds but are normally displayed in Newton Meters (Nm), a torque resistance assigned by the manufacturer.
Too tight, and you can snap the head off or damage the threads. Too loose, and the bolt could come undone during use.
If you don’t have a torque wrench, consider getting yourself one. If you own a bike, it’ll come in handy. Never tighten past hand-tight until you can properly verify the tension with a torque wrench.
This is for your safety and ensures the longevity of your equipment.
Creaking Bike and Bearings
We’ve all experienced an annoying creak coming from our bike. With experience, you’ll identify the culprit quickly, sometimes by sound alone.
Creaking comes from loose bolts, ones that need grease, and worn bearings. Check the head of your seatpost. Often this area is forgotten, and rider weight is constantly applying forces that slowly loosen bolts.
The most common creak I hear, and mechanics diagnose, are loose cranks or bottom brackets (BB) that need replacing. Cranks undergo a ton of torque, all those watts you’re dishing out, right?
You may need a 15 mm socket or an 8 or a 10 mm Allen key for the job. If creaking or grinding sounds continue, your bottom bracket (BB) bearings may need grease or replacing.
If the creaking persists, it could also be your cassette. Lock rings come loose. Give it a wiggle to see if there is any play.
No? Remove the wheel anyway, and check with a lock ring tool to be sure. Sometimes it only takes a quarter turn to solve the problem.
Gears Not Shifting Correctly
It’s been difficult to change gears recently. And once you change, the chain skips and snarls, not wanting to settle into place.
Have you changed the derailleur cables on your bike of late?
If so, they stretch with use and change tension, especially when new, causing them to skip until a new shifting tension is set.
Adjust the tension by turning the cable barrel on the rear derailleur. The amount of turning needed is an acquired skill, so don’t be frustrated if you can’t get it right. Cables typically need to be tightened, turning the barrel counterclockwise should do it.
But how much do you turn it?
Start slow, a quarter turn slow. If the chain still struggles to climb to the next cog, try another quarter turn, repeat, and so forth. The best way to check the gears is to shift a gear, just shift, don’t pedal, then give the cranks a turn. If the tension is right, the chain jumps into place.
Derailleurs have limit screws that set how high or low a chain goes on the cassette. Another screw to consider the B screw. Once set, they tend not to move, but they can be the culprit of poor shifting. All you need is a Phillips head screwdriver and a trained eye.
If you’re up for the challenge, go for it.
Read More : Road Bike Gears Explained : Why the Right Choice Matters
Misaligned Derailleur Hanger
The hanger is that little peninsula on the drive side of your bike’s rear triangle that holds the rear derailleur. If you’ve crashed, or your bike fell over, it can throw the hanger out of alignment. Once misaligned, it’s a chain reaction of shifting problems.
Hangers on older bikes, particularly steel bikes, are part of the frame. In the past, bike frames with unrepairable hangers were put out of commission, so the bike industry made them replaceable.
Smart move, right?
If your replaceable hanger is damaged, get a new one. Remove yours with an Allen key and take it to your shop.
Hanger shapes vary according to brands, so let a shop professional help you find the one you need. If your bike is steel and the hanger too, there is a bike hanger alignment tool to fix the problem.
Any reputable bike shop should have one. I’ve seen it done, but it isn’t recommended to try to straighten a replaceable hanger.
Read More : How to Correctly Shift Your Bicycle Gears
Dirty Bar Tape
Your bike is looking sharp, but the dirt accumulated on your handlebar tape is getting on your nerves. It’s easily remedied.
Option one, give it a good scrub with a bucket of warm water, a sponge, brush, and biodegradable cleaning product (the planet will thank you).
If they don’t come clean, remove the old tape and replace it. Removing the tape is easy, pull out the handlebar end plugs and unravel the tape. You’ll need to start wrapping at the same point, end to the center, so leave a bit of length for the new bartape to be held by the plugs.
Wrapping a handlebar is an art, it takes experience to get it right.
Move up the bar, pulling and laying the tape taut and smooth as you go. There’s a necessary figure-8 shape around the shifters before finishing near the center of the bar. Bind the wrap with the electrical tape color of your choice.
The ones provided in the kit aren’t great. Repeat on the other side and finish with the end plugs.
Spongy Hydraulic Disc Brakes
When your disc brakes get spongy, air or dirty hydraulic fluid may be the offender. The system is closed, but crud and air sneak inside via the brake pistons, moving the brakepads in and out against the disc rotor.
Remove the pads and clean around the pistons with some cotton swabs dabbed in hydraulic oil. Brakes take either mineral or a DOT numbered oil and aren’t interchangeable. Make sure you have the right one.
If this didn’t work, burping the system or changing the hydraulic fluid isn’t for everyone. Your brakes are vital for your security, so if in doubt, leave it to the pros, or learn from someone with more experience. Clean around your pistons every time you change your pads to keep your system as dirt-free as possible.
Read More : A Guide to Bicycle Disc Brakes
Wobbly Wheels
When your wheels are wobbly, they’re out of true.
Each wheel spoke is tensioned, and the right and left sides balance each other out to zero, or true. If your bike is new, has ridden through one or many potholes, or you’ve been in a crash, spoke tension can change, pulling the rim in one direction or another causing the wobble.
An out-of-true wheel with rim brakes is a problem as it causes rubbing along the brake surface, slowing you down. With disc brakes, no braking takes part on the rim itself, only the disc rotor. A disc wheel out of true is less of an issue, at least temporarily.
To properly true a wheel, you need a truing stand and the right colored spoke wrench for your spoke nipples. Depending on where the wobble is, nipples are tightened or loosened to re-tension the spokes back to true. Truing is a science, so practice on some old wheels before doing your own.
Author Recommended Reads


