Tips -

9 Beginner Tips for Using Clipless Pedals

You’ve been riding your new bike for a while, and are feeling more at ease. Your rides are getting longer and you’ve seen people with cycling-specific shoes and pedals. You’re intrigued.

You may be asking yourself if it’s time to make the switch. It’s fun to get a new bit of kit, but do they really make a difference, or are they just for show?

The fact is that going clipless improves pedaling efficiency and power and increases your overall performance. There is a learning curve, but we’re here to help with that.

Here are 9 beginner tips for clipless pedals. Once you switch, you’ll never go back.

On This Page

You'll Fall

Let’s just get this one out in the open right away. 

If you are new to using clipless pedals, especially in the first days or weeks of use, you are probably going to fall, at least once. This isn’t a given of course, but one could say it ranks high on the possibility scale.

Think of it as a necessary step in the learning curve. The advantages of clipless pedals outweigh any of the growing pains you may have to assume. 

Think of it as the next step of being a cyclist.

Get A Proper Cleat Fit

Using clipless means that your foot will be fixed in the same position on the pedal for your foreseen cycling future, or unless you change pedal brands. 

Having the cleat correctly installed and aligned is important for your comfort, pedaling efficiency and to prevent any avoidable injuries. What feels okay in the house, or riding around the neighborhood may not be great for longer rides.

DIY cleat fits are possible, but it’s easier to set them up with an experienced professional to avoid any problems. Knees can be a weak link in the chain for a lot of us, so do yourself a favor, invest a few extra dollars in the process, it’ll make the transition a whole lot easier.

Practice on Soft Ground

Practicing in the house is one thing, but the reality is the best teacher. 

Head outside and find a patch of soft grass or ground and hold onto something stable like a tree or playground swings with one hand, and place the other hand on your handlebars.

If possible, hold the brake engaged to avoid rocking as you practice, or slide your hand close to the stem for better balance. Clip in by engaging the toe-side portion of the cleat and then putting pressure on your heel until you hear a click. Turn your ankle out (or in) to release. 

Try riding in a circle on the grass, repeating the process as you turn.

Anticipate Your Stops

You’ve begun to get a feel of your clipless pedals and are ready to hit the road. 

Getting started is one thing, and rolling on the flats is easy, but when there’s an intersection or a red light ahead, you start to get nervous.

Relax, everything will be fine. 

Until you have more confidence, anticipate your stops by releasing the cleat well before you may need to. There’s enough real estate on most clipless pedals for you to place your foot on top. That way you’re quickly ready to put a foot down if necessary.

Get the Bike Moving Before Clipping In

The opposite of anticipating your stops, practice getting the bike moving before you clip back in

A good way to do this is to place your left (or right pedal if you’re a lefty) pedal at about ten o’clock on the non-drive side (two o’clock for lefties). Pushing off from this angle will give you a good take-off on flat ground.

Once on the move, even if only the front of your cleat has managed to gain hold in the pedal, pull up and around to give yourself another turn. Repeat these revolutions until you are comfortable enough to clip back in and be on your way.

Loosen the Pedal Tension

Clipless pedals are equipped with a tension screw that allows you to adjust the amount of force it takes to release your foot from the pedal with a turn of your ankle. 

Some may require a screwdriver, others an allen key, but follow the + and – signs to adjust accordingly.

Clipless pedals today are designed to release in all directions, meaning that if you fall, you should release no matter what. Be aware that if you loosen them too much, you may be coming loose when you don’t expect it, so try them out before you head out on a longer ride to avoid unnecessary frustration.

Minimize Walking with the Cleats

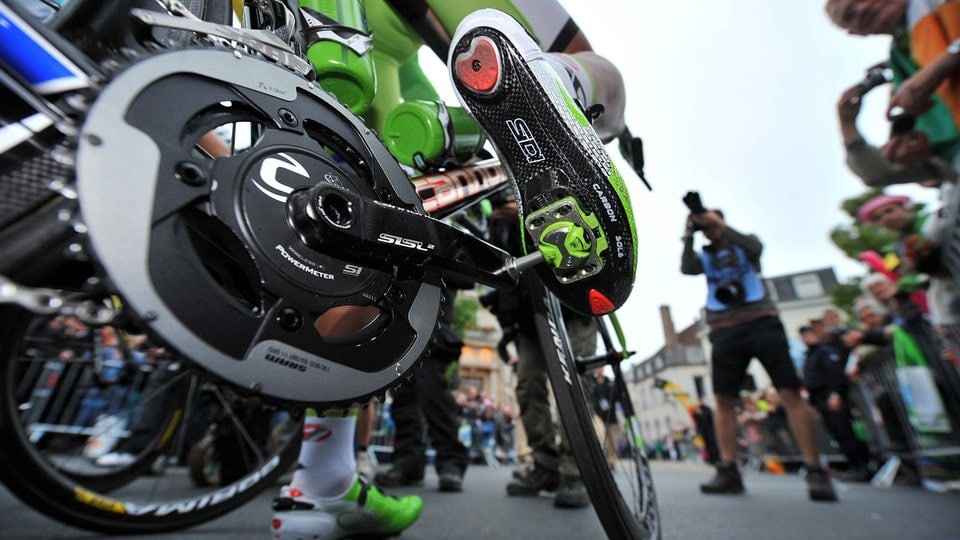
Cycling shoes have a rigid sole to help you transfer the most power into your pedal stroke. Their rigidity is one of the reasons you may feel like you’re walking like a duck when you first put them on. It’s the lack of flexion under the forefoot that is responsible, but without it, but you’ll get used to moving around in them soon enough.

Are we meant to wear our cycling shoes and cleats when we aren’t on the bike? No, but everyone does it, and coffee stops oblige it.

New cleats aren’t cheap, and wearing your cycling shoes around like your Sunday’s best will wear them out more quickly. Inspect your cleats from time to time and check their wear marks to ensure proper cleat and pedal function.

Some brands such as Wahoo (formerly Speedplay) and LOOK sell heavy-duty rubber covers that fit over your cleats to protect them when you’re walking. One cover does not fit all, so make sure yours match your brand of pedals.

Most cyclists put a habitual foot down when they have to stop, so one cleat will usually wear faster than the other, it just depends which side is your dominant one.

Or Walk With Your Cleats

Historically, the cleats for road cycling shoes are attached to the bottom of the shoe with screws which complicate the simple task of walking when necessary. Other shoes and pedal combinations exist that place the cleat in a recessed opening on the bottom of the shoe’s sole to make walking a lot easier and less slippery in wet weather.

Shoes with rubberized soles used for mountain bike, touring, or gravel riding fall into this category as riders have to be able to dismount, mount, and walk around on a regular basis as part of these cycling categories. These types of pedals use a much smaller cleat that conveniently stays out of the way.

Both of these systems are equally effective in increasing your efficiency and pedal power, and they function in the same manner which will require practice too. Except for kids’, any pedal will fit any bike. There are no written rules for which one is right for you, so take the time to consider your riding style before purchasing as you do have options.

Practice, Practice and Practice

While these tips and tricks will help you get acquainted with your new pedals and cleats, nothing can replace a good old experience. The time-old adage holds true, practice makes perfect.

You’ll get used to the feeling of clipping in and out just by getting out and enjoying your time on the bicycle.

Some brands make changing the cleat a snap by leaving a small marker on the bottom of your shoe. The new cleat fits right over the marker, finding the exact location of its predecessor. 

If your brand doesn’t have this feature, get a Sharpie pen or other type of marker and trace out its shape on the bottom of your shoe before you replace it.

Hisham Mirza

Hisham is a staff writer who has been with us for the past two years. He likes writing about gravel riding, and he’s always looking for new stories to tell our readers.